
Introduction
The Vesta Control Panel is a free, open-source tool for managing websites, email, databases, and DNS. It offers a streamlined interface for various hosting functions.
For more details, visit the official website: VestaCP.
VestaCP Template Installation
To install the VestaCP template with VPS SELL
- Log in to the Client Area.
- Navigate to "My Services > VPS" in the top menu.
- Click "Manage" for your service.
- Press "Install OS."
- Choose the operating system, agree to the warning, and click "Continue."
- Wait 5-10 minutes and refresh the VPS management page.
The VestaCP template includes:
- CentOS 7
- Apache 2.2.15
- PHP 5.5.28
- MySQL 5.5.45
- Nginx 1.4
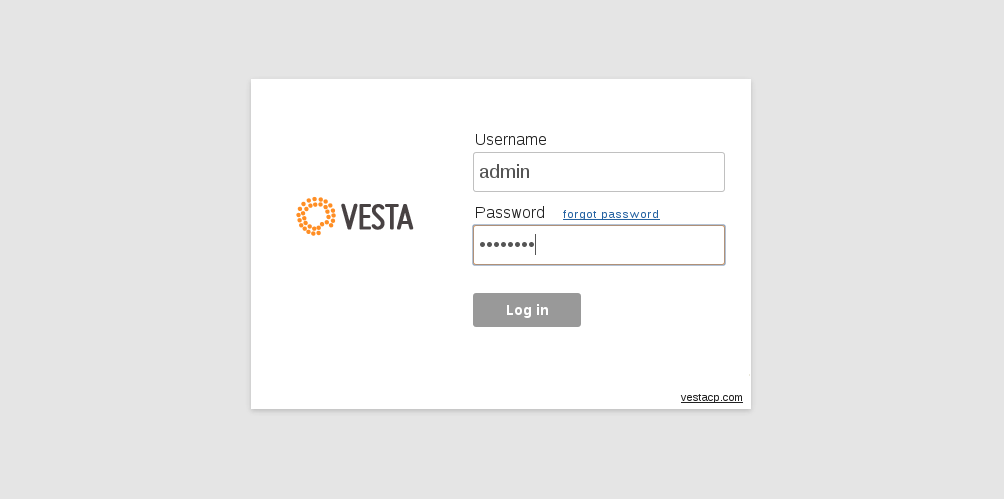
1. Login
VestaCP operates on port 8083. Access the control panel by entering the following URL in your browser:
https://ip_of_your_server:8083/login/
Log in using the username "admin" and the root password from the Client Portal.
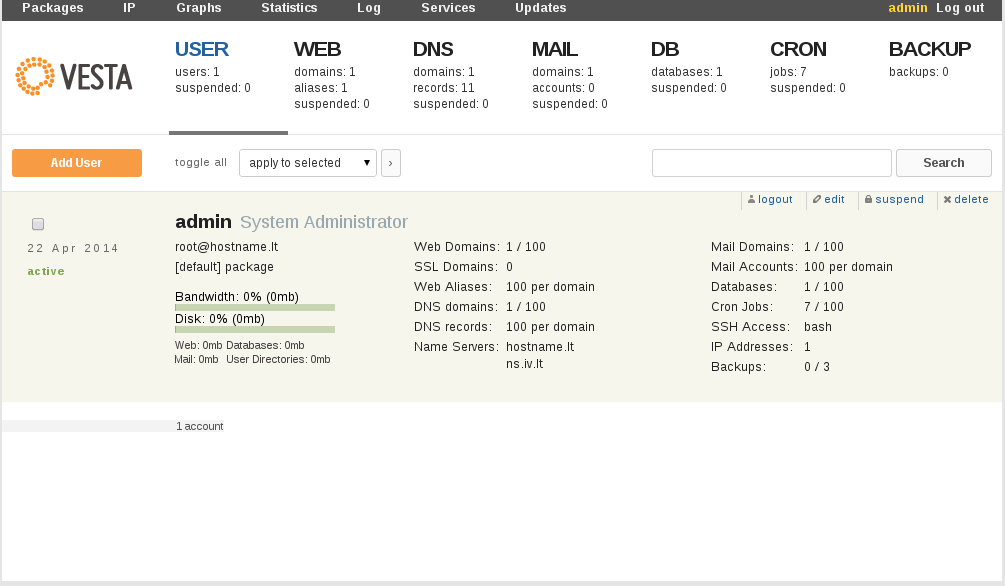
2. Adding a New User
To create a new user:
- In the control panel, select "User."
- Click "Add User."
- Fill in the required details and click "Add."

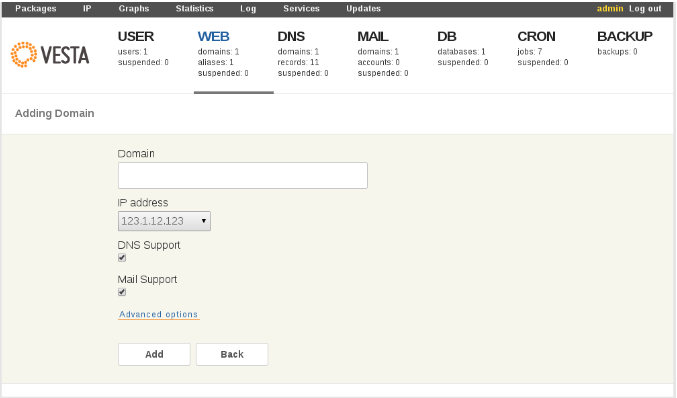
3. Adding a New Website
To add a website:
- Log in as the desired user.
- Select "Web" in the control panel.
- Click "Add Web Domain."
- Enter the necessary information and click "Add."
To add an additional FTP user, check the box for "Additional FTP" under "Additional options."
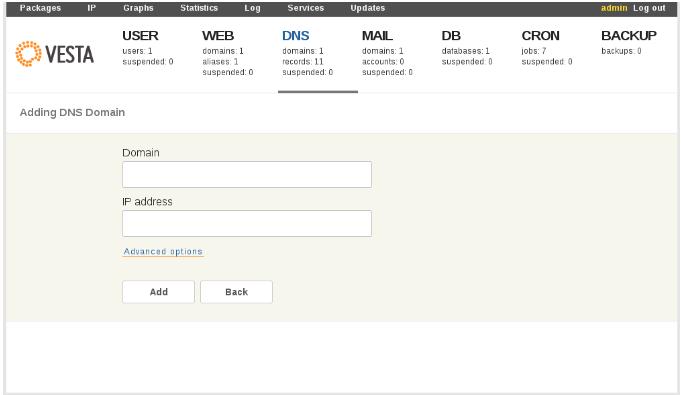
4. Adding a Domain to DNS Management
To manage DNS:
- Select "DNS" in the control panel.
- Click "Add DNS Domain."
- Fill in the required details and click "Add."
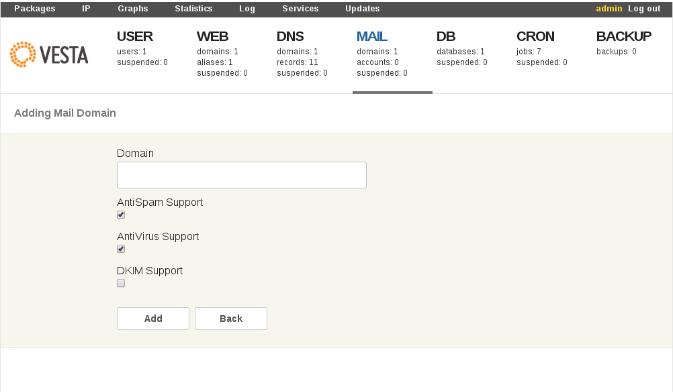
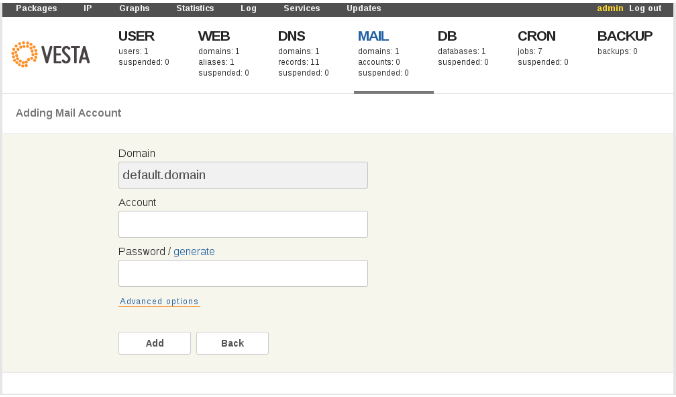
5. Adding an Email Account
First, add a domain for email:
- Select "EMAIL" in the control panel.
- Click "Add Mail Domain."
- Enter the required information and click "Add."
Then, to create an email account:
- Go to "MAIL."
- Next to the domain, click "+ Add Account."
- Enter the details and click "Add."
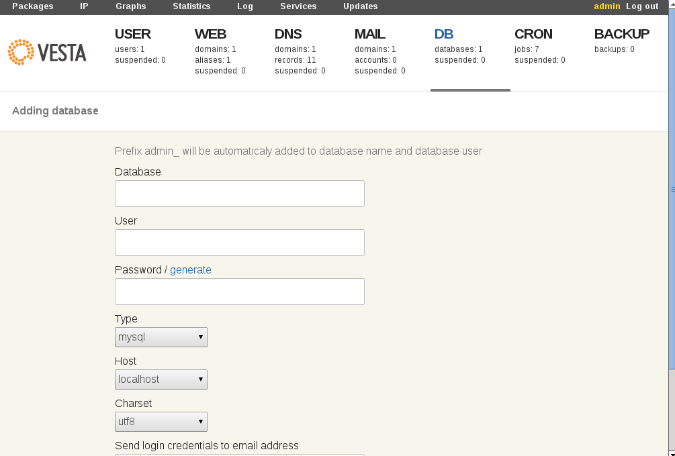
6. Adding a Database
To add a database:
- Select "DB" in the control panel.
- Click "Add Database."
- Provide the necessary information and click "Add."
7. Password Reset
To change the VestaCP admin password, run the following command via SSH:
Enter and confirm the new password. You should see:
passwd: all authentication tokens updated successfully.
For additional help, visit: