Similar to SSL (Secure Sockets Layers), SSH connections also use dedicated keys for authentication. When you connect to a server via Secure Shell (SSH), it receives a fingerprint for the ECDSA key. This key is saved on your computer and is used the next time you try to establish a connection with that server. This process ensures that the connection between your machine and the server is secure.
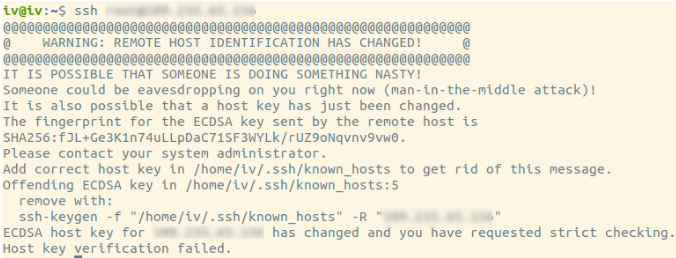
If the SSH client detects that the fingerprints differ from what it recognizes as correct, it will return the error “Warning: Remote host identification has changed” during login:
The error message references a **known_hosts** file, which is a list of SSH remote hosts known to the computer. This file serves as a reference for the authentication process.
When connecting to the server for the first time, you should receive a confirmation asking if you want to connect. If you agree, the fingerprint for the ECDSA key is saved in the mentioned file.
However, there are instances where the server's ECDSA key has changed since your last connection. This change might indicate that you're connecting to a different server without your knowledge. If the new server is malicious, it could intercept all data sent to and from your connection, known as a man-in-the-middle attack.
Other possible reasons for the ECDSA key fingerprint change include:
- OS re-installation;
- The server IP has changed and you have "CheckHostIP yes" in your config;
- You have connected to the same server using a different hostname.
There are other reasons, but if you receive this error after making some of the mentioned changes to the server and you are confident they are the cause, you can resolve the issue with the following recommendations.
Linux and macOS
The simplest solution on these systems is to use the ssh-keygen utility to delete the offending key from your known_hosts file. You can do this with the following command:
ssh-keygen -R [hostname-or-IP]
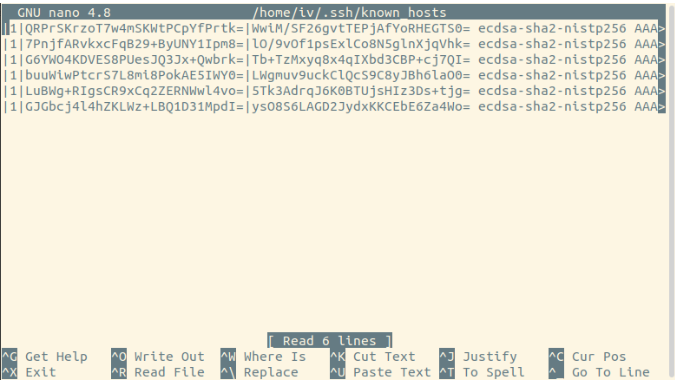
As mentioned, ECDSA key fingerprints are stored in the known_hosts file. The error message will indicate the line number where the key is stored.

You can manually remove the key by opening the file with your preferred text editor:
nano /home/iv/.ssh/known_hosts
The warning message will also provide the full command needed to remove the old key:

In the above-mentioned case, the command is
ssh-keygen -f "/home/iv/.ssh/known_hosts" -R "[hostname-or-IP]"
Windows
By default, Windows does not support SSH connections. To establish one, you need to use an SSH client.
PuTTY
If you are using PuTTY, you will receive a warning but have the option to proceed:
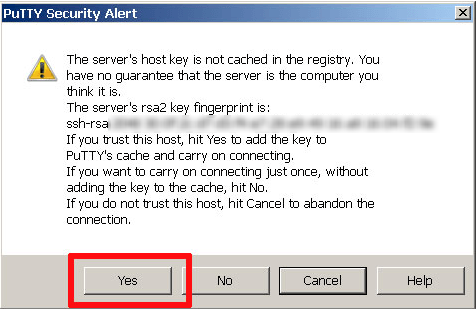
If you know the reason for the key mismatch, click Yes.
Another way to remove the fingerprint key when using PuTTY is via the Registry. To open it, type Regedit in the Windows search bar.
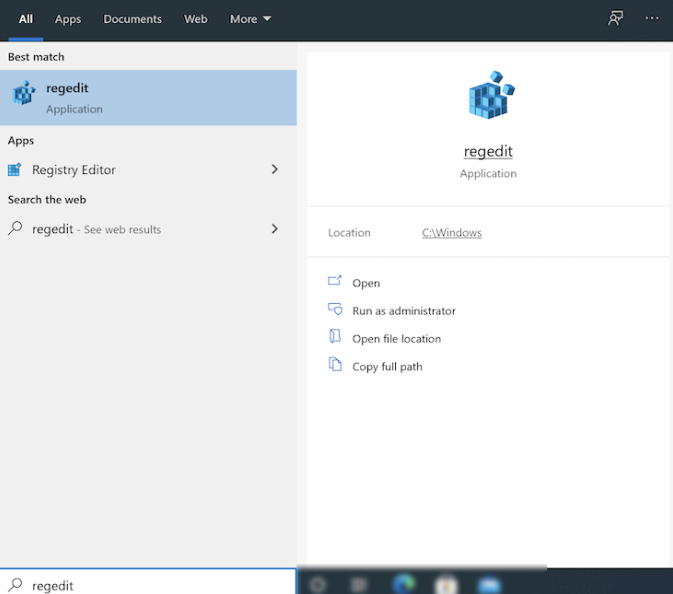
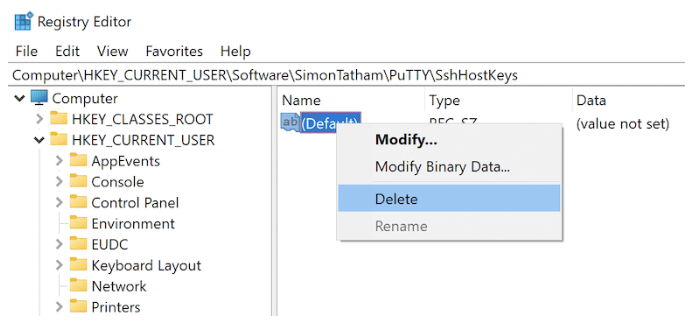
Navigate to the following location:
HKEY_CURRENT_USER/Software/SimonTatham/PuTTY/SshHostKeys/
Saved connections on your computer will be listed here. Find the one causing the login issue and delete it.
OpenSSH
If you are using OpenSSH as an SSH client on Windows, you can remove the key by navigating to the .ssh folder. To find its location, enter %**USERPROFILE**% in the Windows search bar.
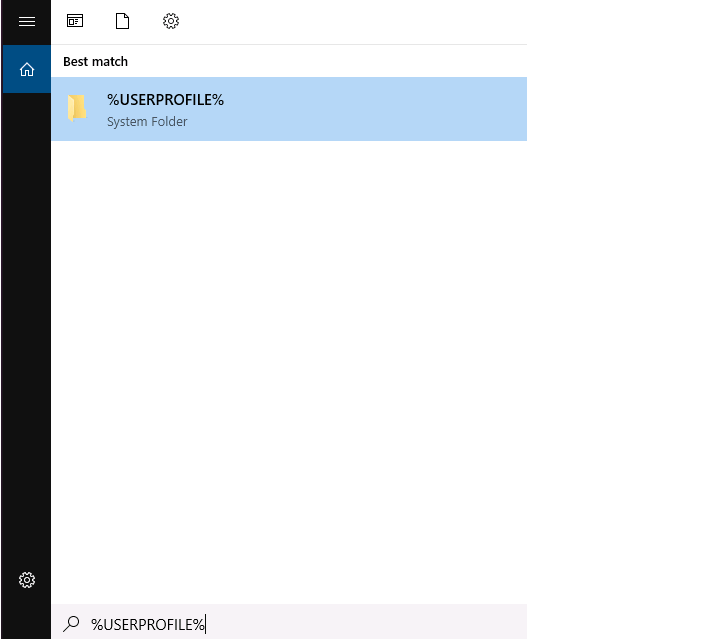
In the .ssh folder, locate and open the known_hosts file.

Open the file and delete the key causing the login issue.
