This tutorial shows how to install WordPress with Docker Compose when the server’s operating system is Ubuntu 16.04, 18.04, or 20.04.
WordPress is one of the most popular ways to create your own website or blog. This content management software (CMS) allows managing important aspects of your website, such as content, without needing to know anything about programming. However, if you want to set up different web host environments or something else on your server, you can install Docker Compose, which simplifies the installation process to a single deployment command, greatly reducing the time and effort required.
What is Docker and Docker Compose?
Docker is a tool used to easily create, deploy, and run applications using containers. Docker Compose is a tool that allows you to easily define and start multi-container applications. With Docker Compose, you can link together individual Docker containers so that they can work together.
The main difference between Docker and Docker Compose is that Docker manages single containers, while Docker Compose manages multiple container applications.
How to Install WordPress on Docker?
I will show you how to deploy a WordPress container and another MySQL container that WordPress will use to store its data. Docker Compose will ease the networking between these containers so they can run together. For this, you will need to install Docker, Docker Compose, and create a docker-compose.yml file on your server.
1. Docker Installation
1.1 Firstly, update your existing list of packages:
sudo apt update
1.2 Run this command to ensure your server has the necessary packages to allow the use of Docker’s repository:
sudo apt install apt-transport-https ca-certificates curl software-properties-common
1.3 Add Docker’s GPG key:
curl -fsSL https://download.docker.com/linux/ubuntu/gpg | sudo apt-key add -
You should see an output “OK”.
1.4 Run this command to verify the fingerprint of the GPG key:
sudo apt-key fingerprint 0EBFCD88
1.5 Then add the stable Docker repository:
For Ubuntu 16.04 or 18.04, use this command:
sudo add-apt-repository "deb [arch=amd64] https://download.docker.com/linux/ubuntu $(lsb_release -cs) stable"
For Ubuntu 20.04, use this command:
sudo add-apt-repository "deb [arch=amd64] https://download.docker.com/linux/ubuntu focal stable"
1.6 Now update your package index and install Docker CE:
sudo apt update
1.7 Install Docker CE:
sudo apt install docker-ce
You will be asked to choose Y/N. Write Y.
1.8 Add your limited Linux user account to the Docker group:
sudo usermod -aG docker $USER
After you run this command, close your SSH session and open a new one for this change to take effect.
Check if Docker has been installed successfully:
sudo systemctl status docker
docker run hello-world
2. Docker Compose Installation
2.1 Run this command to download Docker Compose:
sudo curl -L "https://github.com/docker/compose/releases/download/1.25.5/docker-compose-$(uname -s)-$(uname -m)" -o /usr/local/bin/docker-compose
Check the latest version of Docker Compose and replace 1.25.5 in the command:
https://github.com/docker/compose/releases
2.2 Set file permissions:
sudo chmod +x /usr/local/bin/docker-compose
Check which Docker Compose version has been installed:
docker-compose --version
3. Setting Up WordPress on Docker Compose
To install WordPress, you will need two containers: one for the database and another for WordPress. These two containers can be set up using a docker-compose.yml file (Note, the file name cannot be chosen freely). Create a new directory in your home folder called “wordpress” and cd into it:
mkdir ~/wordpress/
cd ~/wordpress/
Create the **docker-compose.yml** file with the **nano** command. When the directory is created, create a file docker-compose.yml that contains the following code:
services:
db:
environment:
MYSQL_DATABASE: wordpress
MYSQL_PASSWORD: password
MYSQL_ROOT_PASSWORD: password
MYSQL_USER: wordpress
image: "mysql:5.7"
restart: always
volumes:
- "db_data:/var/lib/mysql"
wordpress:
depends_on:
- db
environment:
WORDPRESS_DB_HOST: "db:3306"
WORDPRESS_DB_NAME: wordpress
WORDPRESS_DB_PASSWORD: password
WORDPRESS_DB_USER: wordpress
image: "wordpress:latest"
ports:
- "80:80"
restart: always
version: "3.3"
volumes:
db_data: {}
Don’t forget to change the credentials - WORDPRESS_DB_PASSWORD, MYSQL_ROOT_PASSWORD, and MYSQL_PASSWORD. Passwords for MYSQL_PASSWORD and WORDPRESS_DB_PASSWORD should be the same.
Now it's time to start the WordPress installation from the WordPress directory. To start your Docker containers, use this command:
docker-compose up -d
If the code in the docker-compose.yml file has been added correctly, you will see an output similar to the following:
Wait for the installation to be finished and you should see an output similar to the following:
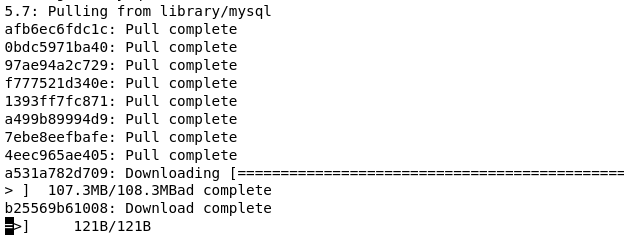
Then wait for the installation to be finished and you should see an output similar to the following:

If you get an error similar to this:
yaml.scanner.ScannerError: mapping values are not allowed here in "C:\...\docker-compose.yml", line x, column y
This could mean that your added code in the file docker-compose.yml is incorrect and you need to re-check it. Use this online tool to verify your code and it will show where the error is:
yamllint.com
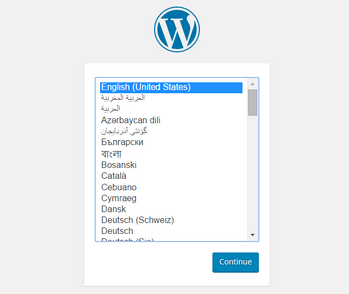
When the installation is finished, you can open your server’s hostname or IP address in a web browser to test the WordPress installation. You should be redirected to the initial WordPress setup page at http://publicIP/wp-admin/install.php.
Keep in mind, if your server’s operating system is not Ubuntu, you should use the tutorial prepared for that OS. A tutorial can be found in Docker’s official documentation.