
Introduction
Nextcloud is an open-source platform that allows you to set up your own cloud storage.
One of the key benefits of using Nextcloud for cloud storage is data security. The data is stored on a server you control, enabling you to configure protection measures and manage access rights.
Additionally, there are over a hundred apps that can be integrated and utilized with Nextcloud.
In this guide, we will demonstrate how to install Nextcloud on RedHat-based systems (CentOS 7 and AlmaLinux 8).
Prerequisites
To install Nextcloud, the following software is required:
- Apache Web Server: You can follow our Apache installation guide for instructions.
- MySQL: Installation instructions can be found in our MySQL guide.
- PHP: Follow our PHP installation guides:
- PHP guide for CentOS 7
- PHP guide for AlmaLinux 8
Installation Guide
Step for AlmaLinux 8 Only: Import GPG Key Repository
rpm --import https://repo.almalinux.org/almalinux/RPM-GPG-KEY-AlmaLinux
1. Update the System
2. Enable Extensions
Install the necessary extensions.
For CentOS 7:
yum -y install mod_ssl php php-cli php-mysqlnd php-zip php-devel php-gd php-mcrypt php-mbstring php-curl php-xml php-pear php-bcmath php-json php-pdo php-pecl-apcu php-pecl-apcu-devel php-ldap
For AlmaLinux 8:
yum install php-xml php-cgi php-cli php-mysql php-mbstring php-gd php-curl php-zip wget zip
3. Download Installation Files
This guide installs Nextcloud version 28, but you can choose any version. Visit the Nextcloud page, select the desired version, and copy its link:
(https://download.nextcloud.com/server/releases/)
Download using wget:
wget https://download.nextcloud.com/server/releases/nextcloud-28.0.3.zip
4. Unzip the Downloaded File
First, install 'unzip' if not already installed:
yum install unzip
Then extract the files:
unzip nextcloud-28.0.3.zip
Move the extracted folder:
mv nextcloud/ /var/www/html/
Create a directory for Nextcloud files:
mkdir /var/www/html/nextcloud/data
Assign the required ownership:
chown apache:apache -R /var/www/html/nextcloud/data
chown apache:apache -R /var/www/html/nextcloud
5. Create Configuration File for Nextcloud
Create an Apache configuration file:
vi /etc/httpd/conf.d/nextcloud.conf
Add the following content, replacing "serverhostname" and "admin@domain.com" with your actual server hostname and email:
<VirtualHost *:80>
ServerName serverhostname
ServerAdmin admin@domain.com
DocumentRoot /var/www/html/nextcloud
<directory /var/www/html/nextcloud>
Require all granted
AllowOverride All
Options FollowSymLinks MultiViews
SetEnv HOME /var/www/html/nextcloud
SetEnv HTTP_HOME /var/www/html/nextcloud
</directory>
</VirtualHost>
Restart Apache:
systemctl restart httpd
6. Open Ports
Allow HTTP and HTTPS ports:
iptables -I INPUT -p tcp -m tcp --dport 80 -j ACCEPT
iptables -I INPUT -p tcp -m tcp --dport 443 -j ACCEPT
Save the changes:
iptables-save
If firewalld is enabled, allow HTTP and HTTPS services:
firewall-cmd --permanent --add-service=http
firewall-cmd --permanent --add-service=https
firewall-cmd --reload
7. Configure Nextcloud with Let’s Encrypt SSL on CentOS 7
This step is specific to CentOS 7.
Install EPEL release and certbot:
yum -y install epel-release
yum -y install certbot
Execute the following commands, replacing "your_server_hostname" and "admin@domain.com" with your actual details:
export DOMAIN="your_server_hostname"
export EMAIL="admin@domain.com"
certbot certonly --standalone -d $DOMAIN --preferred-challenges http --agree-tos -n -m $EMAIL --keep-until-expiring
Modify the Nextcloud configuration file:
vi /etc/httpd/conf.d/nextcloud.conf
Add these lines:
<VirtualHost *:80>
ServerName your_server_hostname
ServerAdmin admin@domain.com
RewriteEngine On
RewriteCond %{HTTPS} off
RewriteRule ^(.*)$ https://%{HTTP_HOST}$1 [R=301,L]
</VirtualHost>
<IfModule mod_ssl.c>
<VirtualHost *:443>
ServerName your_server_hostname
ServerAdmin admin@domain.com
DocumentRoot /var/www/html/nextcloud
<directory /var/www/html/nextcloud>
Require all granted
AllowOverride All
Options FollowSymLinks MultiViews
SetEnv HOME /var/www/html/nextcloud
SetEnv HTTP_HOME /var/www/html/nextcloud
</directory>
SSLEngine on
SSLCertificateFile /etc/letsencrypt/live/your_server_hostname/fullchain.pem
SSLCertificateKeyFile /etc/letsencrypt/live/your_server_hostname/privkey.pem
</VirtualHost>
</IfModule>
Restart Apache:
systemctl restart httpd
8. Configure Nextcloud with Let’s Encrypt SSL on AlmaLinux 8
This step is for AlmaLinux 8.
Install Certbot:
dnf install certbot python3-certbot-apache mod_ssl
Enable self-signed SSL/TLS certificates:
openssl req -newkey rsa:2048 -nodes -keyout /etc/pki/tls/private/localhost.key -x509 -days 365 -out /etc/pki/tls/certs/localhost.crt
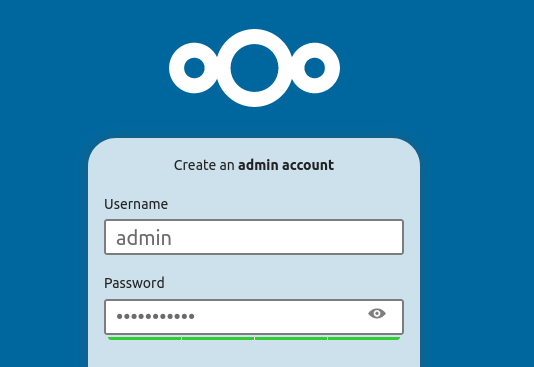
9. Complete Nextcloud Installation
Open Nextcloud in your browser using your server hostname:
[](https://your_server_hostname)
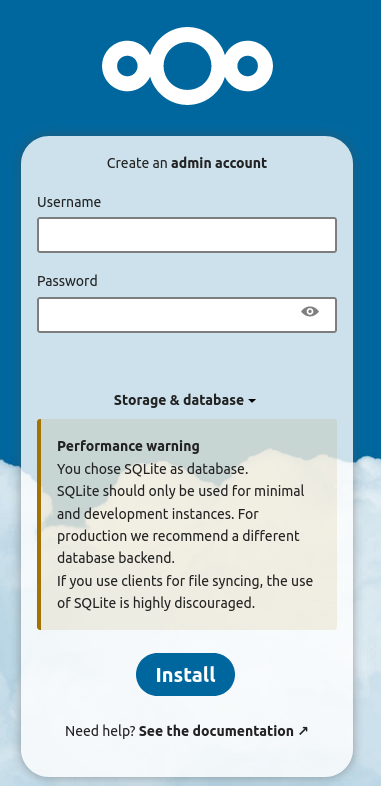
Complete the setup by creating a Nextcloud user with a username and password.
Then, click on "MySQL/MariaDB" and enter the MySQL username, password, and database name. Click "Install" to finish the installation.

That's it! You can now manage your files through Nextcloud.