Our VPS allows kernel version upgrades, a common reason customers prefer Linux VPS over Container VPS. Some applications or services require higher kernel versions. By default, our VPS does not come with the latest kernel version, so this guide will help you manually change your kernel version.
Check Current Kernel Version
First, check your current kernel version with the following command:
The output will be similar to:
Linux 4.14.0-041400-generic
Kernel Upgrade for Ubuntu
Step 1: Download Required Files
Download the necessary files for your chosen kernel version from the Ubuntu Kernel PPA.
Source provides all the required files for kernel to upgrade. Once you check the specific version of Kernel you may see many links to download, for example:
Build for amd64 succeeded (see BUILD.LOG.amd64):
linux-headers-4.13.0-041300-generic_4.13.0-041300.201709031731_amd64.deb
linux-headers-4.13.0-041300-lowlatency_4.13.0-041300.201709031731_amd64.deb
linux-image-4.13.0-041300-generic_4.13.0-041300.201709031731_amd64.deb
linux-image-4.13.0-041300-lowlatency_4.13.0-041300.201709031731_amd64.deb
The first one is required, and then you need the rest of 2, which both has to match for example: both generic or both lowlatency.
You download all the files for example:
wget http://kernel.ubuntu.com/~kernel-ppa/mainline/v4.14/linux-headers-4.14.0-041400-generic_4.14.0-041400.201711122031_amd64.deb
wget http://kernel.ubuntu.com/~kernel-ppa/mainline/v4.14/linux-image-4.14.0-041400-generic_4.14.0-041400.201711122031_amd64.deb
wget http://kernel.ubuntu.com/~kernel-ppa/mainline/v4.14/linux-headers-4.14.0-041400_4.14.0-041400.201711122031_all.deb
Step 2: Install the Kernel
Install the downloaded files:
dpkg -i *.deb
Step 3: Reboot the System
Reboot the system for changes to take effect:
reboot
Step 4: Verify the Kernel Version
After rebooting, verify the kernel version:
uname -sr
Kernel Upgrade for CentOS
Step 1: Enable ELRepo
Enable ELRepo, a third-party repository, by executing the following commands:
rpm --import https://www.elrepo.org/RPM-GPG-KEY-elrepo.org
rpm -Uvh http://www.elrepo.org/elrepo-release-7.0-3.el7.elrepo.noarch.rpm
Step 2: List Available Packages
List available packages from ELRepo:
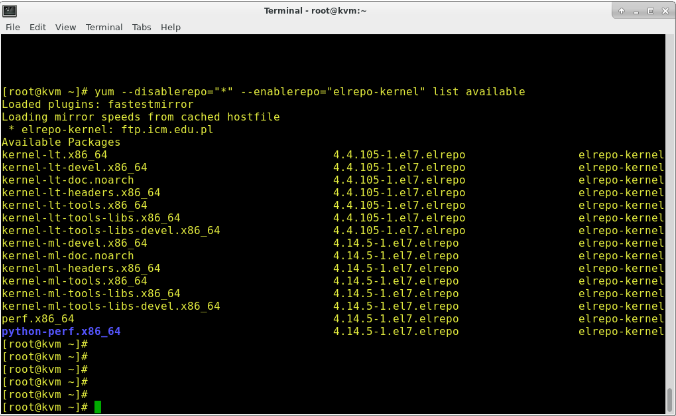
yum --disablerepo="*" --enablerepo="elrepo-kernel" list available
Step 3: Install the Latest Kernel
Install the latest mainline kernel (kernel-ml):
You will be presented will all the available packages, like this:
yum --enablerepo=elrepo-kernel install kernel-ml
Step 4: Reboot the Server
Reboot the server:
Step 5: Verify the Kernel Version
Verify the kernel version:
Step 6: Update GRUB
If the kernel version hasn't changed, update the default kernel in GRUB:
Edit the GRUB configuration:
Change the line to:
Recreate the GRUB configuration:
grub2-mkconfig -o /boot/grub2/grub.cfg
Step 7: Final Reboot
Reboot the server again:
Your kernel version should now be updated.