Introduction
FileZilla is a free, cross-platform FTP application that includes the FileZilla Client. It supports FTP, SFTP, and FTPS (FTP over SSL/TLS), allowing you to transfer files securely between your computer and your VPS. Unlike traditional FTP, which sends data in plaintext, SFTP encrypts both your login credentials and file transfers, enhancing security.
Downloading and Installing FileZilla
For Windows and macOS:
- Download FileZilla from the official website here.
For Linux:
apt-get install filezilla
Using FileZilla
Open FileZilla:
Launch FileZilla from your Start menu (Windows), Launchpad (macOS), or your Linux distribution's application launcher.
Connect to Your VPS:
- Host: Enter the IP address or hostname of your VPS.
- Username: Enter the username you want to connect with (e.g., 'root').
- Password: Enter the password for the user.
- Port: Use
22 for SFTP (recommended) or 21 for FTP.

Initiate Connection:
Click “Quickconnect” to start the session.
Trust the Host Key (First-Time Connection):
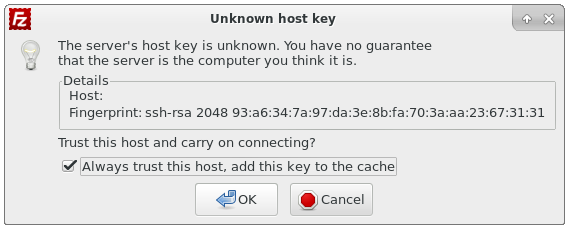
If this is your first time connecting with FileZilla, you’ll see a warning about the host key being unknown. Check the box “Always trust this host, add this key to the cache” and click OK.

- Transfer Files:
You’ll see a split view with your local filesystem on the left and your VPS filesystem on the right. Drag and drop files between the two panes to transfer them.
Conclusion
You’ve now learned how to transfer files between your computer and your VPS using FileZilla. For further details, you can refer to: