
Let’s Encrypt is a free, automated, and open certificate authority (CA) run by the Internet Security Research Group (ISRG) for the public's benefit. This tutorial guides you on how to secure your Webmin websites using Let's Encrypt certificates.
The instructions are based on the "Webmin 1.9 with CentOS 7" template and are designed for self-managed virtual private servers.
Preliminary Requirements
- "Webmin 1.9 with CentOS 7" template installed on the server.
- Fully updated server software:
yum update
- Git package installed:
yum install git -y
Steps to Install Let's Encrypt Certificates
Downloading Let's Encrypt Client
git clone https://github.com/letsencrypt/letsencrypt /opt/letsencrypt
Installing the Necessary Python Module
yum install python-argparse -y
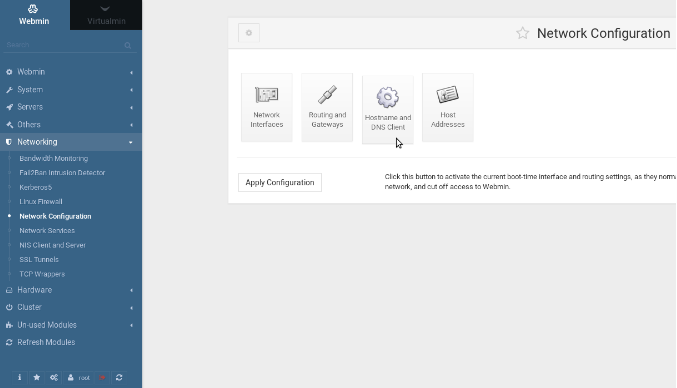
Adding Additional Name Server
To ensure Let's Encrypt certificates work properly, add the "localhost" nameserver:
- Navigate to
Webmin control panel > Networking > Network Configuration > Hostname and DNS Client.
- Add
127.0.0.1 as an additional name server.
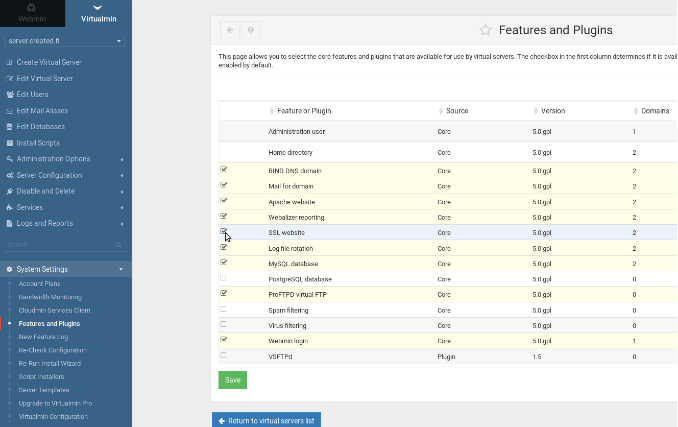
- Enabling SSL Feature
To activate the certificate function for your virtual servers:
- Open
Virtualmin control panel > System Settings > Features and Plugins.
- Check
SSL website and save the settings.
- Installing Let's Encrypt Certificate
- For a New Virtual Server:
- Open
Server Configuration > SSL Certificate > Let's Encrypt and press the Request Certificate button.
- For an Existing Virtual Server:
- Enable the SSL website feature before installing the certificate.
- Open
Edit Virtual Server > Enable Features.
- Check
SSL website enabled? and save.
- Then proceed with the steps outlined for a new virtual server.
By following these steps, you can secure your Webmin websites using Let's Encrypt certificates.