
**Optimizing your server can greatly enhance performance and user experience. One effective method is using LiteSpeed Web Server, a high-performance and scalable web server with many features designed to strengthen your web hosting infrastructure. This tutorial explains how to install LiteSpeed Web Server and use its LiteSpeed Cache plugin (LSCWP) to improve the performance of WordPress sites hosted on your server.**
Installation
Installing LiteSpeed Web Server WHM Plugin via SSH
- Connect to your server via SSH.
- Run the following commands:
- After executing these commands, connect to your server through WHM to complete the installation.

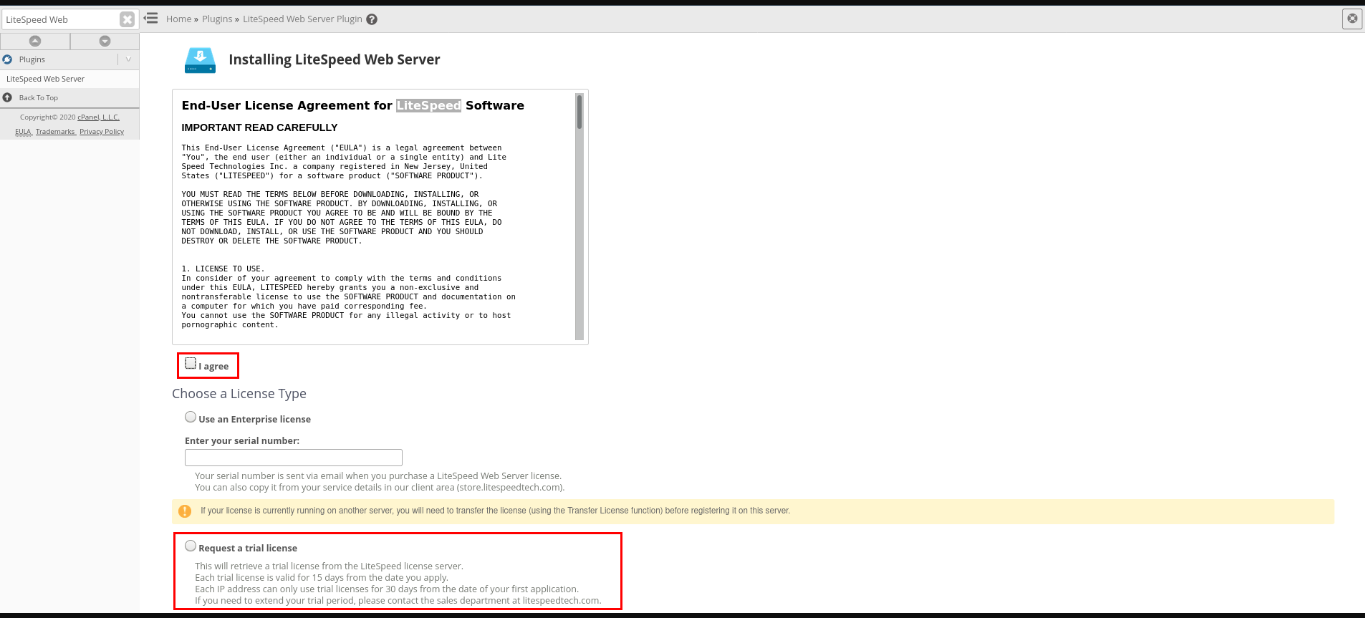
Note: LiteSpeed has a paid license, but for one site, you can use the trial 'Free Starter' version. The server must have no more than 2 GB of RAM to use the free license.
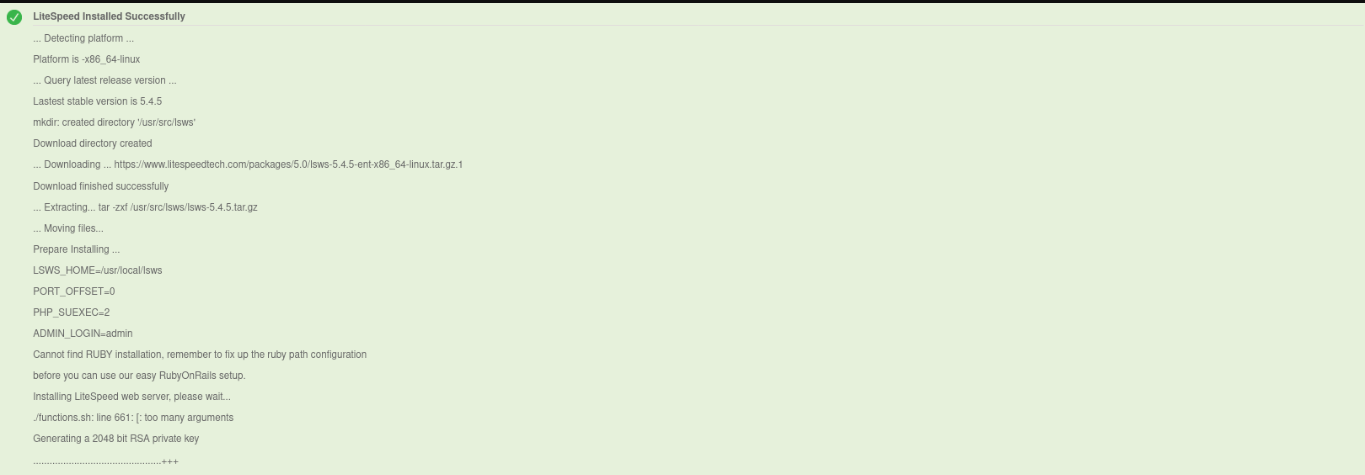
After successful installation, you should see a confirmation message.
Configuration
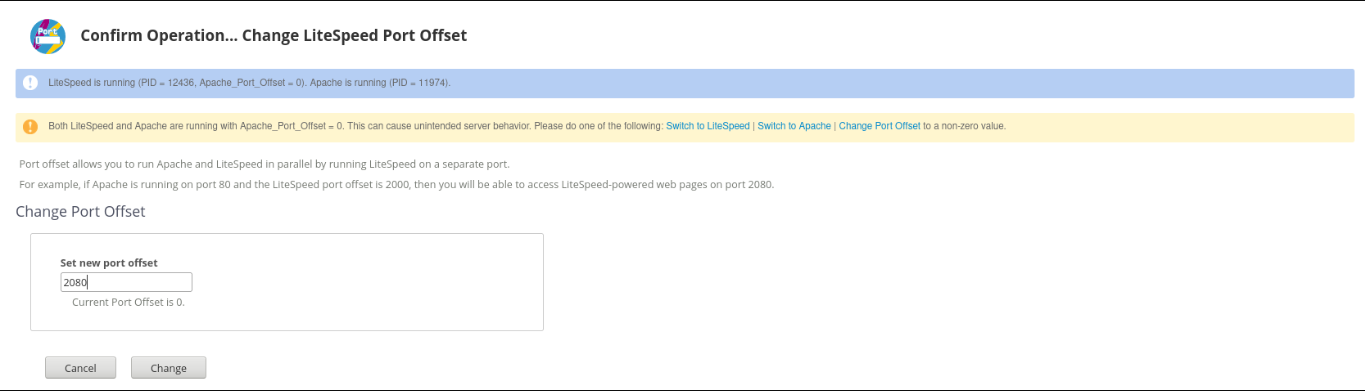
Running Apache and LiteSpeed Web Server Concurrently
If you want to run both Apache and LiteSpeed Web Server services on the server simultaneously, you need to change the port offset.

Disabling the ruid2 Module
The ruid2 module is incompatible with LiteSpeed Web Server. Disable it in the EasyApache 4 settings.

Resolving PHP TimezoneDB Extension Issue
Some EasyApache PHP installations may lack the timezoneDB extension. Ensure this is resolved.


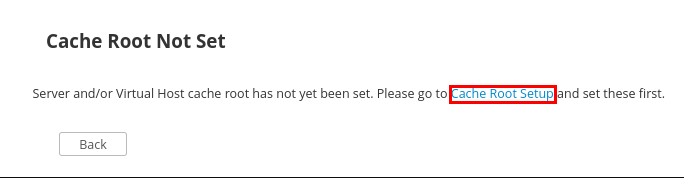
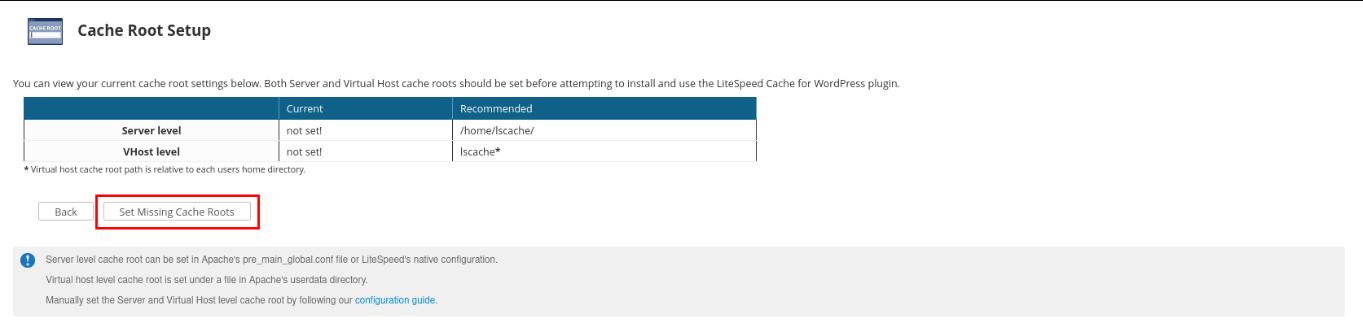
Setting Up Root Cache
- Click on "Manage Cache Installations" in the LiteSpeed manager.

- You will be notified that the server and/or Virtual Host cache root has not been set. Follow the prompts to make changes.
Enabling LiteSpeed Cache
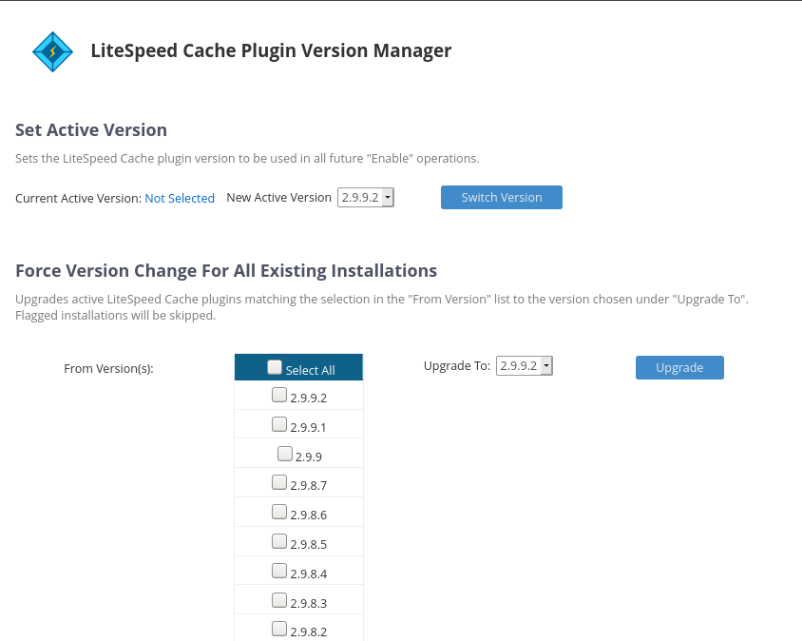
- After setting the cache root, return to the LiteSpeed manager and select "Manage Cache Installations" again.
- Choose the LiteSpeed version you want to use.

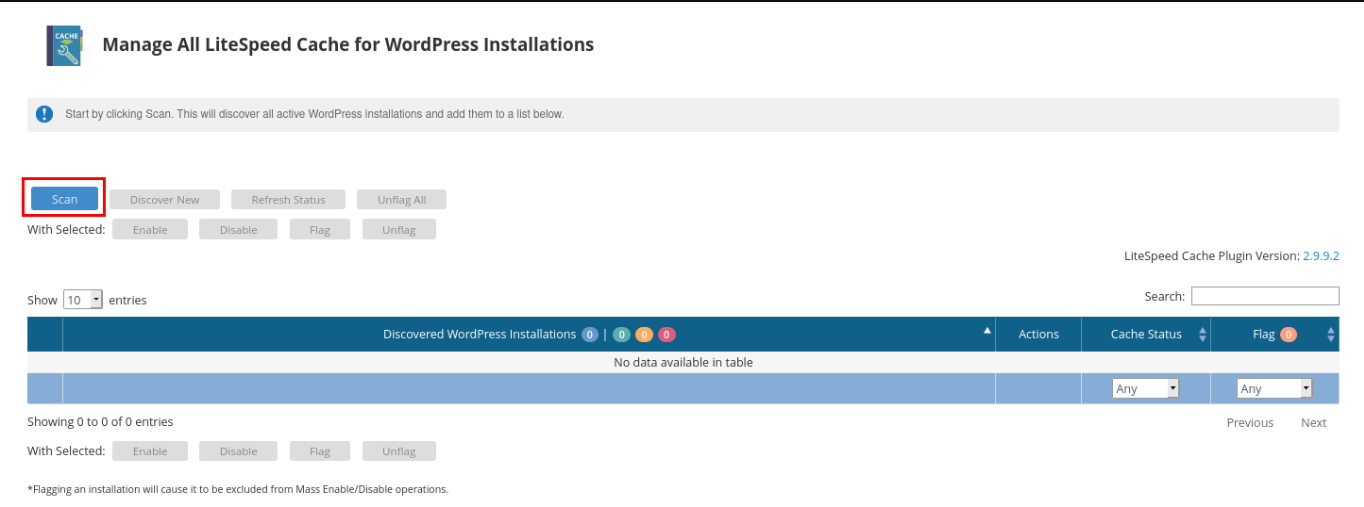
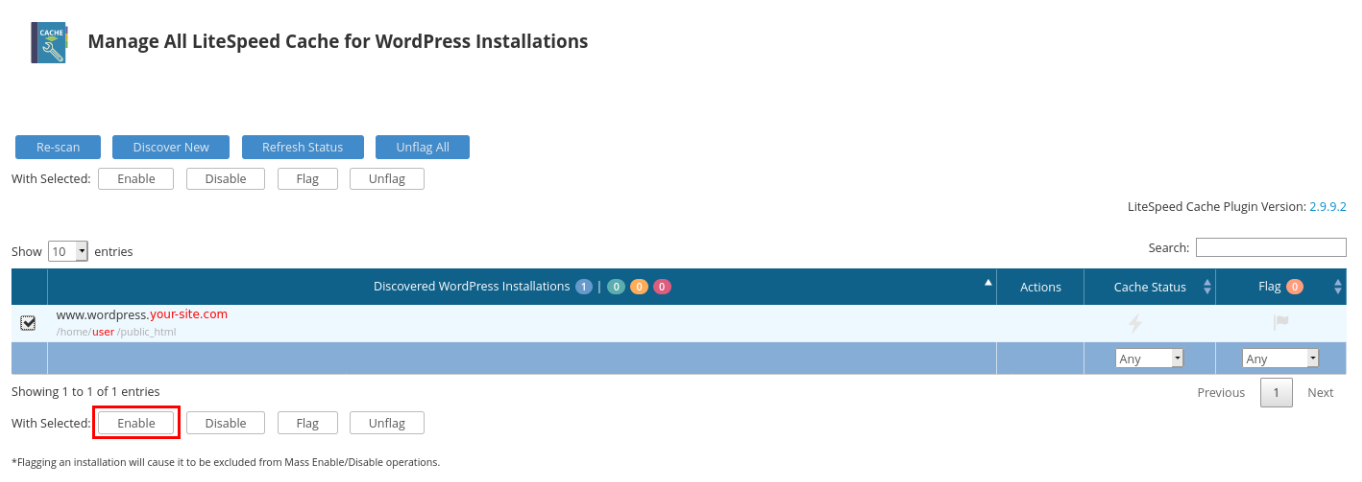
- Run the scan and enable LiteSpeed Cache for the available sites.
Uninstalling LiteSpeed Web Server
To uninstall LiteSpeed Web Server via SSH, run:
/usr/local/cpanel/whostmgr/docroot/cgi/lsws/lsws_whm_plugin_uninstall.sh
By following these steps, you can efficiently install and configure LiteSpeed Web Server and its cache plugin to optimize the performance of your WordPress sites hosted on your server.